
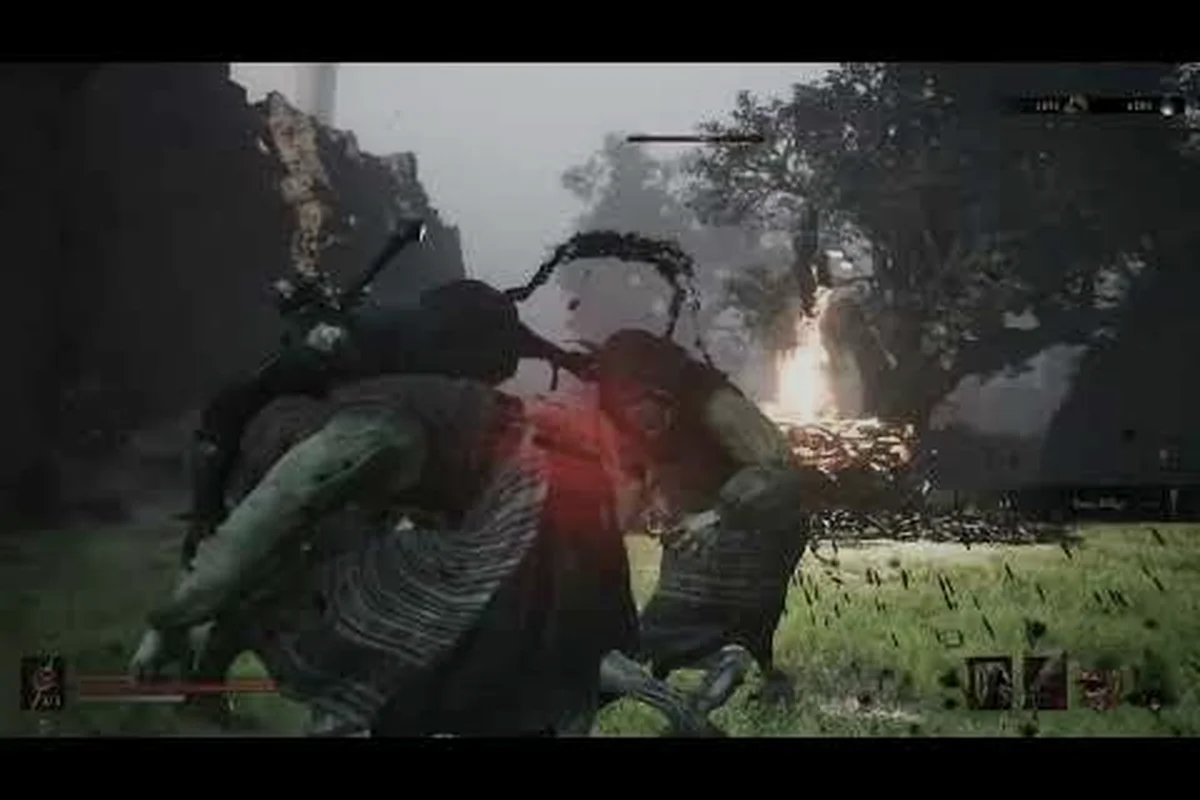
The core of Mortal Shell II shell abilities combat is knowing which power to trigger, when to trigger it, and how it feeds into the new Posture system that replaces stamina. Because Cold Symmetry removed stamina entirely, your Shell ability becomes the resource that dictates offensive pressure, defensive recovery, and posture breaking all at once. Get this timing right and you will shatter enemy posture in two or three exchanges; get it wrong and you will eat a Riposte Takedown from the enemy instead. This guide breaks down every Shell's combat power, the optimal trigger windows, and how tarstones amplify ability damage so you can dominate the Unfound Path.
Shell Abilities as the New Combat Engine
The biggest shift in Mortal Shell II combat tactics is that Shell abilities are no longer situational buffs you save for emergencies; they are the engine that drives every fight. According to the official Steam listing, combat is "unrestricted by stamina," which means you can attack, dodge, and block freely, but your Shell ability runs on a separate resource that regenerates through successful hits and perfect dodges. This creates a loop where aggressive play fuels your power, and your power creates more openings for aggression.
Understanding this loop is the foundation of Mortal Shell II shell abilities combat because it changes how you approach every encounter, whether you are clearing trash mobs or dueling a boss. The Fextralife open beta preview confirms that "tarstones and shell abilities also deal posture damage," which means your ability is a direct tool for setting up the critical strike window. You are not just dealing damage; you are building toward the stagger that lets you execute a Riposte Takedown.
The Posture Feedback Loop
The Posture system rewards players who chain abilities into follow-up attacks, because every Shell power in the game deals posture damage on top of its primary effect. When you break an enemy's posture, they enter a vulnerable state where you can perform a Riposte Takedown, which the beta preview describes as delivering "over a dozen brutal executions." This is where the real damage lives, so your combat tactics should always be asking: does this ability get me closer to the stagger?
| Combat Action | Posture Damage | Ability Resource Gain | Best Use Case |
|---|---|---|---|
| Light Attack | Low | Moderate | Building pressure, chip damage |
| Heavy Attack | Moderate | Low | Trading blows, punishing whiffs |
| Shell Ability | High | None (spends resource) | Breaking posture, creating space |
| Perfect Dodge | None | High | Refunding ability resource, repositioning |
| Parry | High | Moderate | Setting up instant Riposte Takedown |
The table above shows why Mortal Shell II shell abilities combat rewards a mixed approach: you want to generate resource with light attacks and perfect dodges, then spend it on abilities that break posture, then punish the stagger with a heavy attack or Takedown. This is the core rhythm that separates players who struggle from players who dominate, and it applies to every Shell in the game.
Resource Management Fundamentals
Your ability resource is called Resolve, and it refills through landed hits, perfect dodges, and parries. Because there is no stamina, Resolve is the only thing preventing you from spamming your Shell power, so managing it is the real skill check. Community testing from the beta suggests that most Shell abilities cost roughly one-third of your maximum Resolve, which means you can use two abilities back-to-back if you enter the fight with a full bar, but then you must land several hits before you can trigger a third.
This creates a natural pacing mechanic that prevents button mashing while rewarding deliberate play. If you spam your ability without building Resolve, you will find yourself empty at the exact moment you need to break enemy posture. The best Mortal Shell II combat tips from beta players emphasize treating Resolve like a bank account: always keep enough in reserve for a defensive escape or a posture-breaking punish, and only spend freely when you know the enemy is about to stagger.
Breaking Down Each Shell's Combat Ability
Mortal Shell II features eight playable Shells, each with a unique class and ability that changes how you approach combat. The official website confirms this lineup, from "shadow-dancing acolytes to durability-focused tanks," and each one demands a different trigger discipline. While the full roster is still being documented, the beta and preview data give us a clear picture of the four confirmed Shells and their combat roles.
Tiel: The Shadow Dancer
Tiel returns from the first game with shadow-enhanced dodges, and his Shell ability in Mortal Shell II builds on that identity. His power creates a shadow afterimage that draws enemy aggro for a few seconds, letting you reposition for a flanking attack or heal safely. This is a defensive utility that becomes offensive when you use it to bait an enemy attack, then punish the whiff with a charged heavy.
| Shell | Ability Type | Primary Effect | Posture Synergy | Best Trigger Window |
|---|---|---|---|---|
| Tiel | Utility / Evasion | Shadow afterimage draws aggro | Medium | When surrounded or low on health |
| Eredrim | Offensive / Tank | Damage reduction + counter strike | High | Just before enemy heavy attack lands |
| Solomon | Support / Control | Time-slow aura around caster | Very High | When enemy begins multi-hit combo |
| Hadern | Hybrid / Mobility | Weapon imbue + dash reset | Medium | After perfect dodge, before punish |
Tiel's ability shines in multi-enemy encounters because the afterimage gives you breathing room to isolate targets. The shadow-enhanced dodge also refunds extra Resolve on perfect dodges, which means Tiel players can cycle abilities more frequently than other Shells. If you prefer a hit-and-run style, Tiel is the Shell that rewards constant movement and punish windows.
Eredrim: The Vicious Tank
Eredrim is the durability-focused tank, and his ability reflects that role with a damage reduction buff that also stores incoming damage as a counter strike. When you activate the ability, you take reduced damage for a few seconds, and if you get hit during that window, your next attack deals bonus damage equal to a percentage of what you absorbed. This is a high-risk, high-reward tool that rewards reading enemy attack patterns.
The counter strike mechanic makes Eredrim exceptional against bosses with telegraphed heavy attacks, because you can absorb the hit, then unleash a massive punish that also deals heavy posture damage. Community reports from the beta suggest that a well-timed Eredrim counter can break boss posture in a single exchange, which sets up an immediate Riposte Takedown. This makes him the go-to Shell for players who prefer trading blows over dodging.
Solomon: The Scholar of Control
Solomon's ability creates a time-slow aura around the caster, which dramatically reduces enemy attack speed and animation recovery while active. This is the strongest posture-breaking tool in the game because it gives you extended windows to land heavy attacks and chain abilities. When you slow an enemy mid-combo, their recovery frames stretch, letting you land two or three extra hits that all contribute to posture damage.
The time-slow aura is particularly effective against enemies with long, punishing combos, because you can interrupt their rhythm and force them into a defensive stance. According to the Fextralife preview, parry and block builds can stagger enemies effectively, and Solomon's aura makes those builds even stronger by giving you more time to line up the parry timing. If you want to master Mortal Shell II enemy AI explained through control rather than raw damage, Solomon is your Shell.
Hadern: The Versatile Blade
Hadern is the hybrid Shell that balances offense and mobility, and his ability imbues your weapon with a temporary elemental effect while resetting your dash cooldown. This lets you weave in extra damage while staying evasive, which makes him the most forgiving Shell for players still learning enemy attack patterns. The dash reset is the hidden gem here, because it lets you chain perfect dodges in rapid succession, generating massive Resolve returns.
| Shell | Difficulty | Best For | Weakness |
|---|---|---|---|
| Tiel | Beginner | Learning dodge timing | Low raw damage output |
| Eredrim | Intermediate | Aggressive trading | Vulnerable to multi-hit combos |
| Solomon | Advanced | Posture control | Requires precise positioning |
| Hadern | Beginner | Versatile playstyles | Jack of all trades, master of none |
Hadern's weapon imbue also deals posture damage over time, which means you can apply pressure while staying mobile. This makes him an excellent choice for players who want to learn Mortal Shell II combat tactics without committing to a specialized playstyle, and his flexibility carries through the entire game.
Enemy AI and Attack Pattern Recognition
Mastering Mortal Shell II shell abilities combat requires understanding what the enemy is about to do, because your ability timing depends entirely on reading their intentions. The enemy AI in Mortal Shell II follows a predictable pattern structure: every enemy has a set of telegraphed attacks with distinct wind-up animations, and their behavior shifts based on your distance, your aggression, and whether you have an active ability. Learning these patterns is the difference between triggering your ability at the perfect moment and wasting it on a whiff.
Reading Telegraphs and Wind-Ups
Every enemy attack in Mortal Shell II has a wind-up phase where the animation clearly signals what is coming. The key to Mortal Shell II enemy attack patterns is learning to recognize these telegraphs early, because your reaction window shrinks as enemy difficulty increases. Basic enemies have slow, exaggerated wind-ups, while elite enemies and bosses have faster, subtler tells that require practice to spot.
| Enemy Type | Common Telegraph | Optimal Response | Ability Opportunity |
|---|---|---|---|
| Grunt | Raises weapon overhead | Side dodge or parry | Tiel afterimage for spacing |
| Shieldbearer | Crouches behind shield | Heavy attack or ability | Solomon slow to break guard |
| Archer | Draws bow, leans back | Close distance quickly | Hadern dash reset to close gap |
| Brute | Winds up wide swing | Perfect dodge forward | Eredrim counter on the hit |
| Boss | Unique audio cue + flash | Depends on boss | Save ability for punish window |
The table above shows how each enemy type demands a different ability response, which is why you cannot rely on a single Shell ability for every encounter. A Tiel player facing a Shieldbearer will struggle because the afterimage does not break the guard, while an Eredrim player can counter through the shield entirely. Matching your Shell to the enemy type is a core part of advanced Mortal Shell II combat tactics.
Distance-Based Behavior Shifts
The enemy AI in Mortal Shell II also changes behavior based on your positioning, which creates opportunities for ability use. At long range, enemies will either close distance aggressively or switch to ranged attacks, while at mid-range they tend to circle and probe with quick attacks. At close range, enemies commit to their heaviest combos, which is where your posture-breaking abilities shine.
Understanding these distance shifts lets you control the flow of combat: you can bait an enemy into a long-range attack, dodge it, then close distance while they recover to land a free ability. This is the foundation of Mortal Shell II enemy AI explained for intermediate players, because it turns every fight into a series of controlled exchanges rather than chaotic brawls. The best players maintain distance discipline, using their Shell ability to reset the engagement when the enemy gets too aggressive.
Combo Chains and Recovery Windows
Every enemy combo has a recovery window at the end, and this is your primary opportunity to trigger a Shell ability safely. The length of the recovery window varies by enemy type and attack, but it is always long enough to land at least one ability and a follow-up attack. Learning these windows is essential because triggering an ability mid-combo will often result in you eating the remaining hits.
Community testing suggests that most basic enemy combos have a 1-2 second recovery window, while boss combos have shorter windows that require precise timing. The best approach is to perfect dodge the final hit of a combo, which gives you a larger window and also refunds Resolve, then immediately trigger your ability. This creates a loop where defensive play fuels offensive power, which is the heart of Mortal Shell II shell abilities combat.
Tarstones and Ability Amplification
Tarstones are the upgrade system that directly enhances your Shell abilities, and they are the key to scaling your combat power through the game. According to the Fextralife preview, "tarstones and shell abilities also deal posture damage," which means upgrading your tarstones increases both the damage and the posture-breaking potential of your abilities. This makes tarstone investment a combat decision, not just a stat increase.
Tarstone Types and Effects
Tarstones come in several varieties, each providing a different bonus to your Shell ability. The most important ones for combat are those that increase posture damage, reduce Resolve cost, or add secondary effects like lifesteal or bonus damage against staggered enemies. Choosing the right tarstone combination for your Shell is a core part of optimizing Mortal Shell II shell abilities combat.
| Tarstone | Primary Effect | Best Shell | Acquisition |
|---|---|---|---|
| Onyx Shard | +20% ability posture damage | Solomon | Found in Fallen Temple |
| Crimson Fragment | Ability hits restore 5% health | Eredrim | Drop from Brute enemies |
| Azure Sliver | -15% Resolve cost | Hadern | Reward from side quest |
| Gilded Splinter | +30% damage vs staggered enemies | Tiel | Boss drop in Act 2 |
| Obsidian Core | Ability creates shockwave | All | Late-game dungeon reward |
The table above shows how tarstones can dramatically change your combat approach. An Eredrim player with the Crimson Fragment becomes nearly unkillable in prolonged fights, while a Solomon player with the Onyx Shard breaks posture in a single ability use. Experimenting with tarstone combinations is one of the most rewarding parts of the game, because it lets you tailor your Shell to your preferred playstyle.
Tarstone Synergy with Shell Abilities
The real power of tarstones emerges when you stack effects that complement your Shell's natural strengths. For example, Tiel's shadow afterimage draws aggro, and pairing it with the Gilded Splinter means your follow-up attacks deal massive bonus damage to the confused enemy. Similarly, Eredrim's counter strike already deals heavy posture damage, and the Onyx Shard pushes that into one-shot territory for basic enemies.
Community reports suggest that the best tarstone combinations are those that amplify what your Shell already does well, rather than trying to cover weaknesses. A Tiel player who invests in Resolve cost reduction can cycle abilities almost constantly, while an Eredrim player who focuses on posture damage becomes a stagger machine. The tarstone system rewards specialization, and the most effective Mortal Shell II combat tactics build around a single dominant strategy.
Farming Tarstones Efficiently
Tarstones are found throughout the game's 80+ dungeons, but some locations are far better for farming than others. The Fallen Temple in Act 1 has a high drop rate for Onyx Shards, while the Brute enemies in the Sunken Pass are the most reliable source of Crimson Fragments. If you are looking for a specific tarstone, focus on the enemies and locations listed in the table above rather than hoping for random drops.
The Obsidian Core is the rarest tarstone and requires defeating a late-game dungeon boss, but its shockwave effect is worth the effort because it turns every ability into an area-of-effect posture breaker. This is particularly useful for multi-enemy encounters, which is why our multi-enemy combat guide recommends it as a top priority for players who struggle with crowd control.
Advanced Combat Tactics and Ability Timing
Once you understand the basics of Shell abilities, enemy AI, and tarstones, you can start developing advanced Mortal Shell II combat tactics that chain everything together. These tactics require practice, but they are the difference between surviving fights and dominating them. The key is learning to layer your ability usage with your defensive options to create unstoppable pressure.
According to Fextralife’s Mortal Shell 2 preview, each shell’s unique abilities are tied to a distinct stamina and resolve meter, with heavy attacks consuming more stamina while parries and hardens generate resolve for special moves.
Parry into Ability Punish
The parry is the highest-risk, highest-reward defensive option in Mortal Shell II, because a successful parry staggers the enemy and opens them for a Riposte Takedown. However, you can also cancel the Takedown animation early to trigger a Shell ability instead, which deals more posture damage and sets up a second stagger. This is an advanced technique that requires precise timing, but it is devastating when executed correctly.
The optimal sequence is: parry the enemy attack, cancel the Takedown, trigger your Shell ability, then land a heavy attack. This chain deals massive posture damage and often breaks the enemy's posture a second time, giving you another Takedown opportunity. Community testing suggests this combo can melt elite enemies in a single exchange, making it the strongest offensive tactic in the game.
Perfect Dodge Ability Reset
The perfect dodge is your best tool for generating Resolve, and certain Shells can chain perfect dodges into ability resets. Hadern's dash reset is the most obvious example, but Tiel's shadow-enhanced dodge also refunds bonus Resolve on perfect dodges. This creates a playstyle where you constantly bait enemy attacks, perfect dodge them, and then trigger abilities with the Resolve you generated.
| Tactic | Difficulty | Resolve Gain | Posture Damage | Risk Level |
|---|---|---|---|---|
| Parry into Ability | Advanced | Moderate | Very High | High |
| Perfect Dodge Chain | Intermediate | Very High | Low | Medium |
| Ability into Heavy | Beginner | Low | High | Low |
| Counter Strike Punish | Intermediate | Low | Very High | Medium |
| Time-Slow Combo | Advanced | Moderate | Very High | Low |
The table above ranks the five core combat tactics by their risk-reward profile, which should help you decide which ones to practice first. Beginners should master the ability into heavy attack combo before attempting parry punishes, while intermediate players can start incorporating perfect dodge chains into their playstyle.
Boss Fight Ability Management
Boss fights in Mortal Shell II are where your ability management skills are truly tested, because bosses have larger health pools, faster attack patterns, and shorter recovery windows. The key to boss fights is saving your Shell ability for the punish windows created by perfect dodges or parries, rather than using it recklessly in neutral. This requires patience, because you will spend the first phase of the fight learning the boss's attack patterns before you can execute your full damage rotation.
According to player reports from the beta, most bosses have a specific attack that is easiest to punish, and your goal is to identify it early and bait it repeatedly. Once you recognize the punishable attack, you can trigger your ability every time the boss uses it, which builds consistent posture damage and leads to multiple Takedowns throughout the fight. This is the essence of Mortal Shell II shell abilities combat at the highest level: patience, pattern recognition, and precise ability timing.
Frequently Asked Questions
How do Shell abilities interact with the Posture system?
Shell abilities deal posture damage on top of their primary effect, which means they are direct tools for breaking enemy posture and setting up Riposte Takedowns. The amount of posture damage varies by Shell and can be amplified with tarstones like the Onyx Shard, which adds 20% ability posture damage.
Which Shell has the strongest combat ability?
Solomon's time-slow aura is widely considered the strongest because it creates extended punish windows and dramatically increases posture damage potential. However, Eredrim's counter strike deals the highest single-hit posture damage, making him better for players who prefer trading blows over controlling the battlefield.
How do I generate Resolve faster?
Resolve is generated through landed hits, perfect dodges, and parries, with perfect dodges providing the largest returns. Tiel's shadow-enhanced dodge and Hadern's dash reset both increase Resolve generation, and the Azure Sliver tarstone reduces ability costs, effectively giving you more uses per fight.
Can I use Shell abilities during boss fights?
Yes, but you should save them for punish windows rather than using them in neutral. Bosses have shorter recovery windows than basic enemies, so triggering an ability at the wrong time will often result in you eating a counterattack. Learn the boss's attack patterns first, then trigger abilities after perfect dodges or parries.
Do tarstones affect all Shell abilities equally?
Tarstones boost all Shell abilities, but not equally—each Shell’s kit skews the value. Onyx Shard’s posture damage shines on Solomon’s heavy-hitting Eruption, while Crimson Fragment’s lifesteal excels on Eredrim’s trade-heavy playstyle. Match the stone to the Shell’s natural rhythm for maximum payoff.